Are you recording interviews or creating content using Zoom, but you want it to look better when you’re repurposing that content for social media? And the best thing is you don’t need to be a video editor to do this. So if you’re anything like me over the last few weeks, particularly during the Corona virus issues in 2020 you’ve been spending a lot of time on Zoom calls and in fact a lot of the content, the recording on Zoom can add to your content marketing strategy can be a useful part of your video marketing strategy.
However, by default, the recordings that you get from Zoom, don’t really look good enough to use directly in social media. They’re typically recorded in widescreen or a picture-in-picture kind of an approach. And if you’re planning on repurposing or using these videos on social media as is, chances are it’s not going to look too good. So I’m going to share with you (even if you’re not a video editor), how you can use some available and often free tools to make your Zoom video recordings look better when used on social media. My toolkit for this workflow is the free video converter MPEG Stream Clip, which you can get for Windows or Mac computers and a free Canva account and automatic transcribing and video captioning platform Quicc. It’s a very simple process and I’m going to walk you through it right now.
STEP 1 – Set up your Zoom recording in gallery mode.
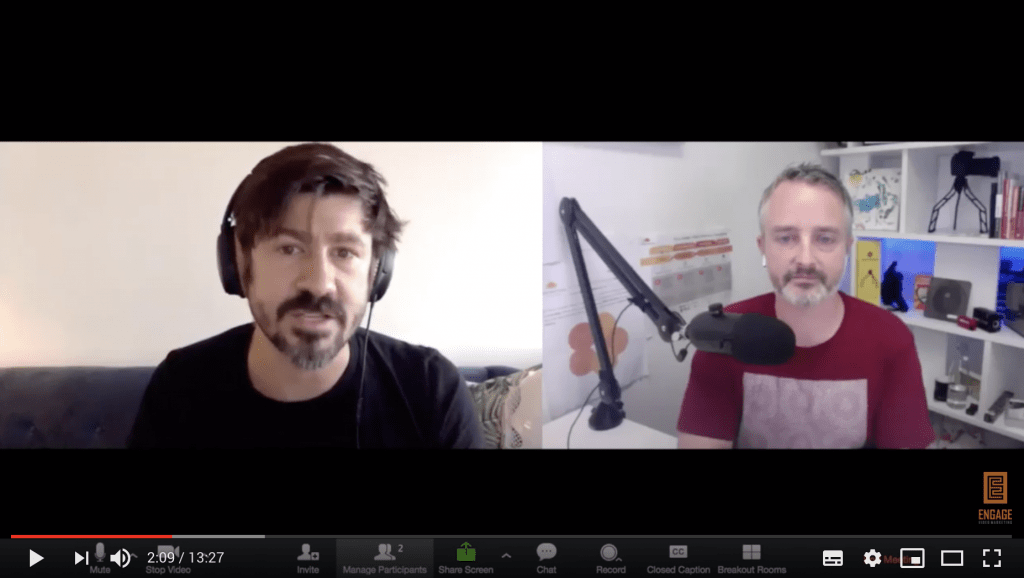
So let’s start with a raw Zoom recording from a meeting. By default, your Zoom recording will be in what’s called speaker mode, where whoever’s speaking at any given time is highlighted in the video. So what we want to do is make sure that when we’re in the Zoom meeting that we’re recording in gallery mode. We’ll actually place the images side by side like you see on a screen. So it’s important to make sure that before you hit record on your Zoom meeting, if you’re intending to repurpose it in this way where you’re actually recording in galleries.
STEP 2 – Take a short extract that you can use on social media.
Once you’ve got your Zoom content recorded, you want to decide on a short extract that potentially you can use on social media as a standard video. So take note of the in-point and out-point of where you’re going to actually edit a short extract.
STEP 3 – Download MPEG Stream Clip
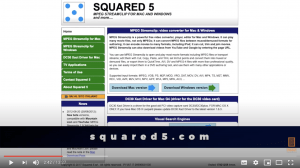
Now without using any video editing software, what we can do is actually download MPEG Stream Clip. Now, MPEG Stream Clip is free open source software, which is available for Windows and Mac. Once you’ve downloaded and installed MPEG Stream Clip, you’ll be able to open a video file.
- So click on file open files, find the relevant Zoom recording file and open.
- Once it’s open in MPEG stream clip, scrub through the timeline to find the in-point that you want to come into your video and press I when you’ve decided on that to set an in-point.
- You’ll see it marked on the timeline and then you’ll want to play and figure out where you want to end this short extract.
- So now we’ve actually got a short piece of video content. We’ve got this short little in-point and outpoint highlighted here. So that’s the section we’re going to extract. So now I can click on File, Export to MPEG4.
- Make sure the quality is set to high.
- Compression is using H.264.
- Leave the frame size at unscaled.
- Leave the sound level or the sound options as default here, and basically everything else as default.
- Make sure that you wind the quality up to 100.
- Click “Make MPEG4” and then you’re going to decide where it is that you’re going to save that to.
- Click save. Wait for it to encode.
- Once the encoding is finished, then you can quit out of MPEG Stream Clip.
STEP 4 – Go to Canva.com
Go to Canva.com and sign up for a free account. Now with a free account, you’re able to do everything that we’re talking about here today.
- So when you’re in Canva, you’re going to click “Create a design”.
- Create custom dimensions, which is a square aspect ratio, perfect for Facebook, Instagram, and LinkedIn, and being less than 60 seconds. This extract will be ideal for the Instagram feed as well as those other platforms. So we’re going to click create design.
- Now we’ve got a blank square canvas. So the first thing to do is to actually import that video extract that we created.
- Click on uploads and upload an image or video and then head to the location where the file is saved. Now that’s actually going to input that extract into Canva.
- Once uploaded, click on that video, add it to my canvas and I’m going to grab the resize handle. In this case, because there are two subjects of the video are actually right in the centre. I can actually size it, bigger than the canvas itself so that we can maximise the amount of space that we’re utilizing for the video components, I’m going to make sure it’s somewhat centred and that no one is really being cut off.
- So I’ve got the video in Canva here in a square frame, but it still doesn’t look particularly good. So now I’m going to customise some of the elements. So one of the first things that you can do is just head over to the elements tab here and import one of these shapes. These free shapes can be used in a number of different ways, but as a simple frame, we’re able to use the shape, change the colour, pick a colour that suits the brand. So we’re going to go with this blue here and then I’m going to click on the icon up in the top right to actually duplicate that same shape and then I can grab that shape and just drag it down and cover up the bottom part of the frame here. Now I’ve got a nice blue background to the square frame, but it still doesn’t look right for social media just yet.
- So let’s get some more branding in there. I’m going to click back to my uploads folder and I’m going to click on images and I’ve previously uploaded a logo file, which I’m going to now reposition and put in the top left, which is awesome, just like that.
- Then I’m going to grab a text element here, click on add a heading and resize that and reposition it. And you can use all of Canva’s tools here to basically choose your fonts, choose your colours, work out what’s going to work for you, and to pick a nice bold font here and say here is a hook based heading and that’s going to be the title for the video. And the important thing is here is we’re actually using that headline to hook a viewer and get them to watch and continue watching this short extract. Now a reformatted, that alignment to be aligned to the right and I’m going to also change the line spacing here to just compress that line spacing a little bit so that it better fits in that heading area as well.
- Now already that starting to look much more like a social media based video, which is really cool. But what I want to do now is to capitalise on some of the other benefits of using Canva for this process because one of the cool things that you can do is actually search for certain stickers. Now stickers are basically animated gift type overlays that you can import into your video as well to add some added interactivity to your videos. So what I tend to do is to focus on these social media stickers here. Now these social media stickers are usually quite relevant to what it is that we might want to do with social media video.So the sticker I’m going to use on this video is designed to encourage people to actually share this video. So I’m going to use one of these share stickers here. I quite like the way that this one kind of catches the eye with a bit of a better grungy movement. So I’m going to drag that in, reposition it, resize it, and drop it down here where at the bottom of the frame where typically the share button will be on various platforms. So it kind of catches the eye with a bit of movement. Now you can customise things as much as you want here in Canva and really go to town on your visual style for your videos. But for the purpose of this demonstration that we’ll do, I’m just going to go up here and change the file name of this. I’m going to say “Zoom Extract01 no captions”, because at this stage it hasn’t actually got any captions across the bottom, which is what we’re going to do in the next step.
- So I’m going to now click on the download option and download the video file. So once that’s downloaded, we now have a video file with all of the branded elements in the frame that we have created in Canva.
STEP 5 – Add captions on your video extract.
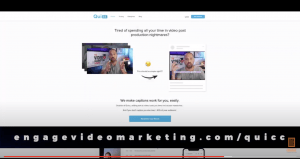
Now the next step is to add advantage captions to the video so that it can be engaged with the sound off social media video. And to do this, we’re going to use a tool called Quicc. Now, Quicc is an automatic transcribing and burnt in captioning programme, which you can get at engagevideomarketing.com/quicc, and by using my partner link engagevideomarketing.com/quicc then you will get double the minutes for your first subscribed month through the platform.
- So once we’re in Quicc, we actually get our video file that we took from Canva and drag the video file into the upload window. It will upload very quickly and then we’ll start processing the video. Now if we click on go to video management, we’ll see that this video is currently being transcribed.
- Typically it takes about the same amount of time as the duration of the video for the transcription to take place. Once it’s transcribed, it’s now ready to edit. Click on the big blue button and you’ll be taken to an interface which enables you to check the transcription and to edit things where it needs to be corrected. So quickly go through and just listen. Playback to your video and make sure that the transcription actually worked quickly. Go through, listen back to your video and adjust any of the transcription to correct things where needed.
- Then you can click on the formatting tools to change the formatting and positioning of your captions. So first of all, I’m going to simplify the captions and just use this transparent background preset here. I’m going to change the font to Arial and I’m going to change the colour to white. Okay, I’m going to change the size here to 26 and I’m going to leave it on centre and there’s no background or no shadow to this as well. So clicking back on the video, I can see that it’s fairly large. I’m going to reposition the vertical positioning. I’m going to try 20 and maybe reposition to 25. You see it’s much too large now, so I’m just going to pick a smaller font size and reposition too. Let’s try 22. So that’s positioned there. You can see here if I play it back, you can see now we’ve got some beautiful in captions that are customised to the font and the style that we want and we’re ready to go.
- Just click “Burn In Captions”, the big blue button on the right and it’ll take a moment to finalise the video and then you’ll be able to download the video ready to go for social media.
And there you have it without any video editing to speak of and over the course of just a few minutes, we’ve been able to create a video that is perfect for social media and looks so much better than the default video output we get when recording Zoom interviews. Hopefully once you’ve done this a couple of times, you’ll find this as super easy and super fast process to run through to get your Zoom videos looking fantastic.