As a video producer, it’s becoming more and more important to be able to quickly deliver social media versions of videos for clients. In this article, I’m going to show you one super quick and highly effective workflow to quickly create social media edits and custom burned-in captions using Final Cut Pro X and an awesome AI, a transcription tool called Simon Says.
With almost every video project we deliver for our clients these days, we’re adding on delivery of social media native versions. Whether they be modified to vertical for IGTV or Stories or 4:5 or square ratios for Instagram and Facebook. That’s a relatively easy thing to achieve in your editing software that I’m going to share with you real soon. However, the tricky bit often be getting the burned-in caption transcribed and on your video, and then styled to look just right. And that’s where time can quickly suck away if you’re either transcribing the video yourself or needing to send it off to something like Rev.com.
The best part is that this workflow and the software I’m going to share with you works regardless of the professional editing software that you are using. But in this case, we’re going to dive into Final Cut Pro and take a look.
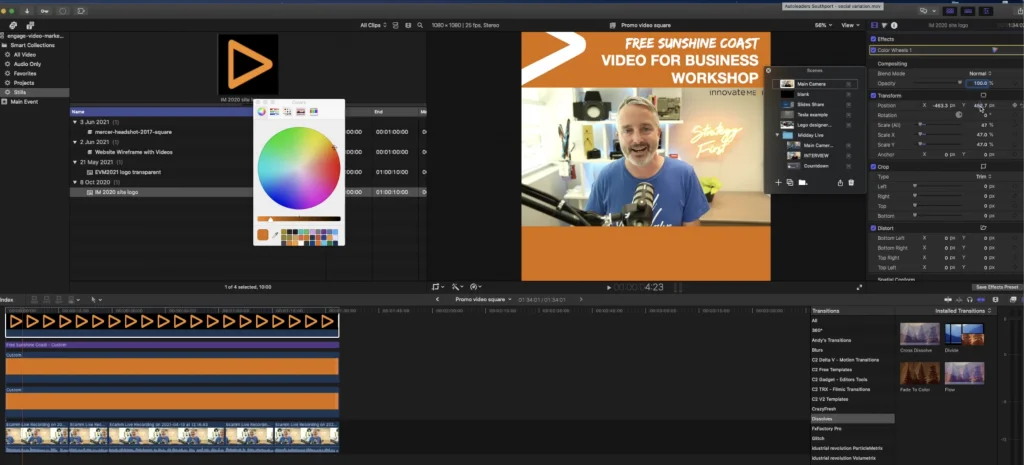
All right, so here we are in Final Cut Pro and I have a timeline with a very simple edit laid out and ready to go. Now, this has been edited in a 16:9 or widescreen aspect ratio. In this case, I’m going to walk you through the workflow for how to create a square aspect ratio, social media version.
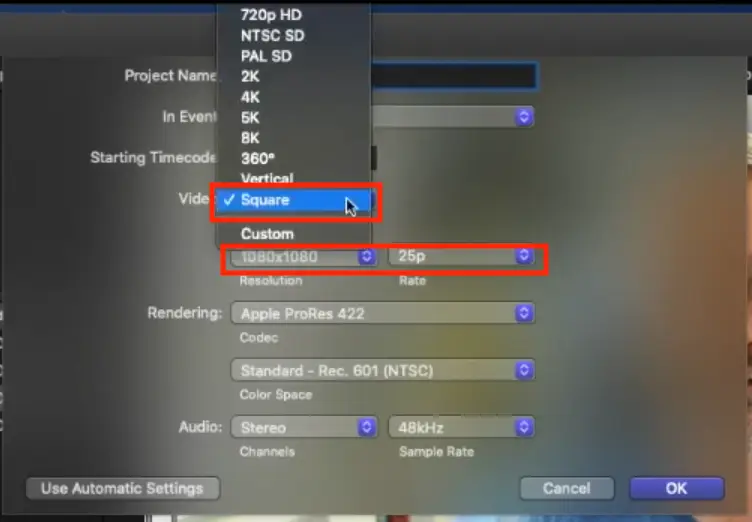
Step 1: Create a new project and add a Title. Select the square option. I’m going to select 1080×1080, and in this case 25P. Leave everything as is and click OK.
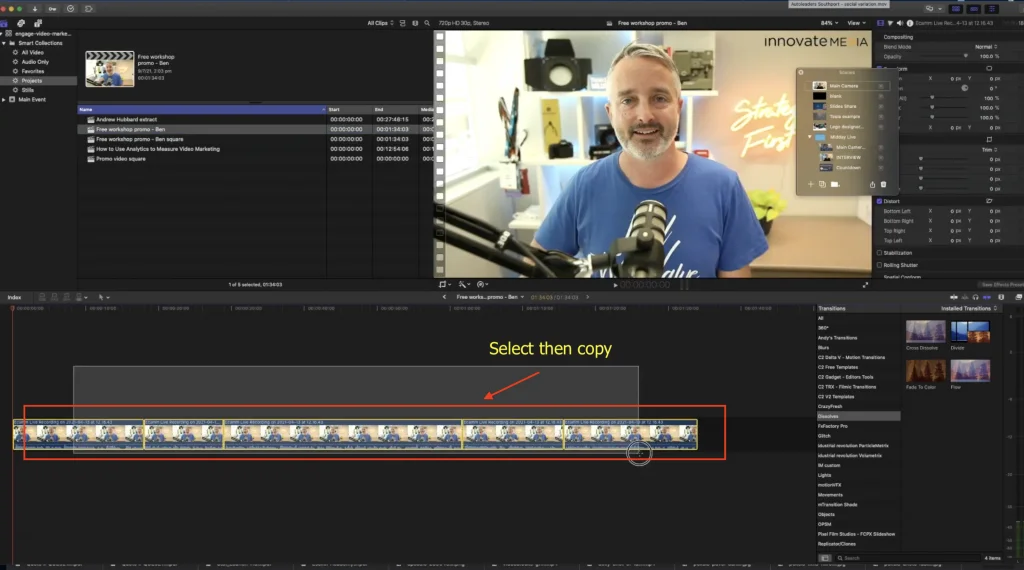
Step 2: Go back to your original 16:9 or widescreen project. Select everything, copy, and then go back to your square project and then paste the project in.
By default, you’ll see that I had some kind of scale and, and reframe in my original edits. Now, as I’ve copied that from the original timeline, it’s kind of looking like it’s all over the place, which is fine because I’m actually going to cover up the top and the bottom of this frame with some branding.
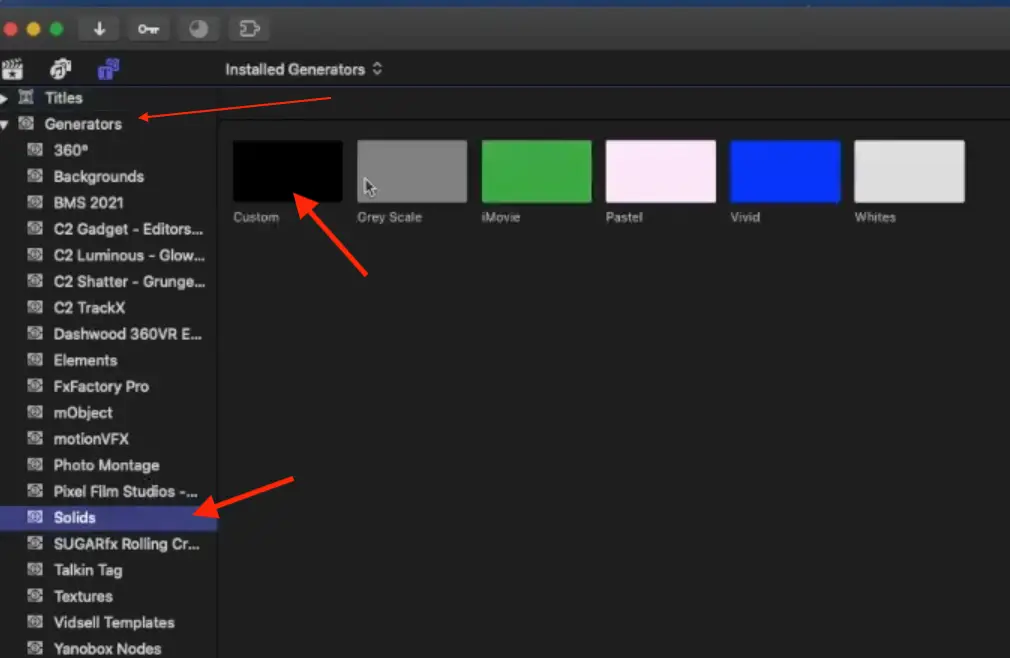
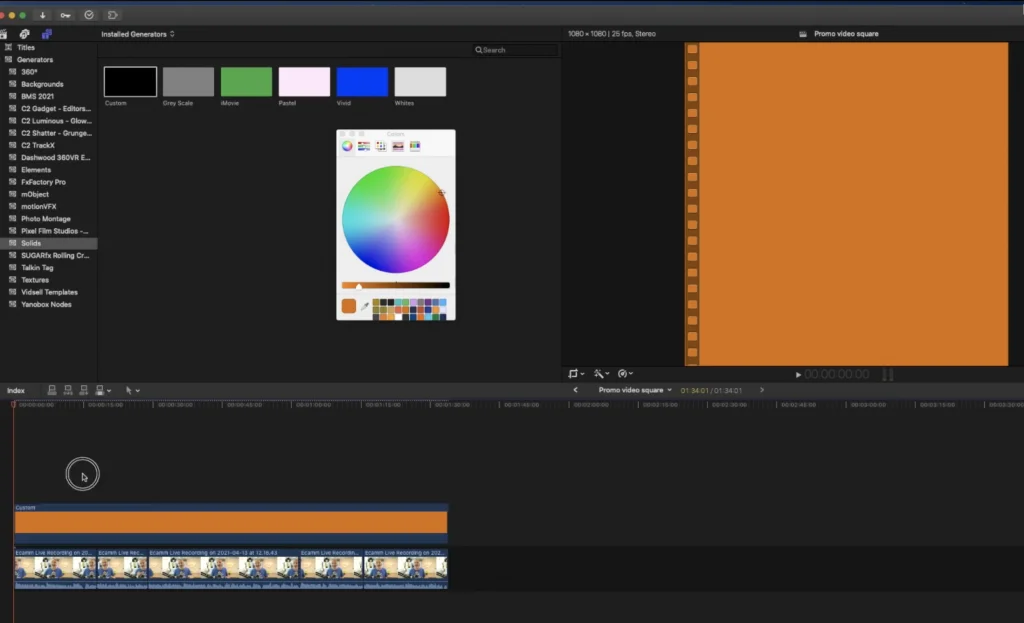
Step 3: Create a solid in generator’s tab then select Custom.
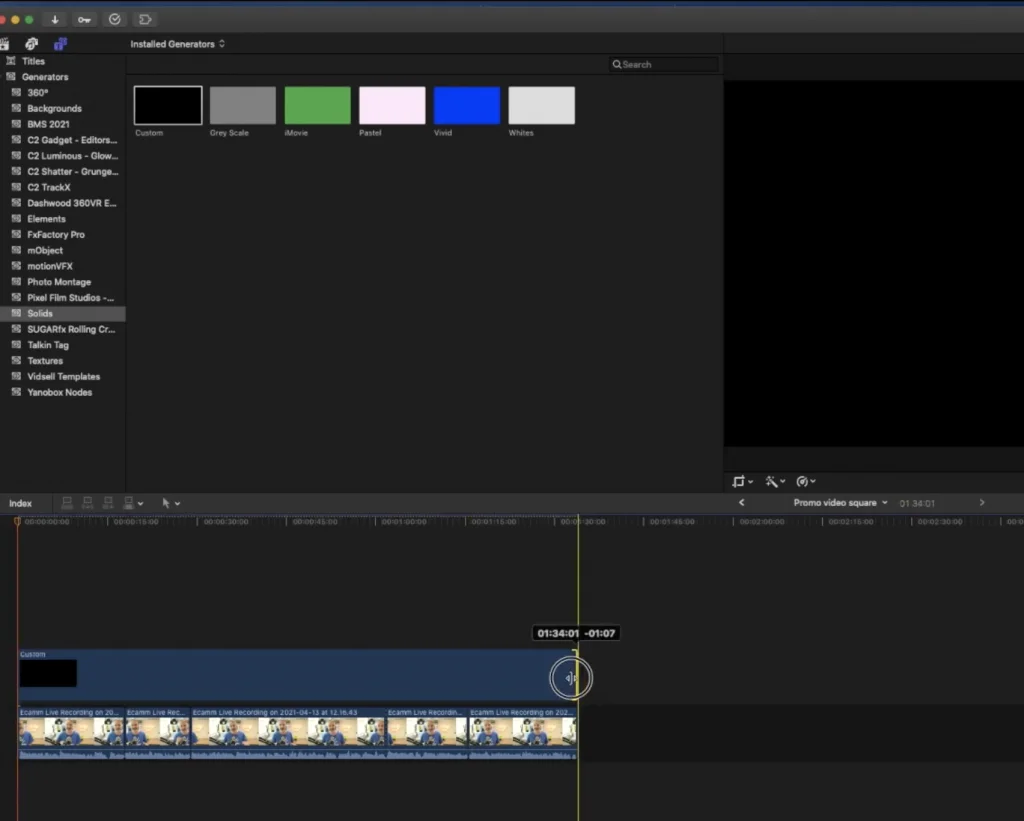
Step 4: Drop that down on the top layer. Drag it out over the duration of the entire clip. Select a brand colour in this case, I’m choosing this, orange colour here.
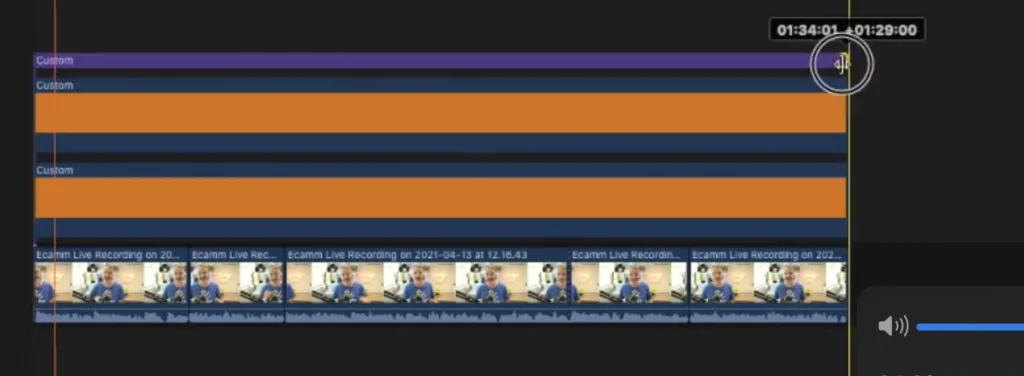
Step 5: Crop the bottom layer. To hit right over the top of the video, 16:9 video. And then I’m going to duplicate or click ALT + Drag and get that copied across.
Now crop the top down to line up with the bottom, because that layer is positioned over top of the main timeline when it’s reframing in that way.
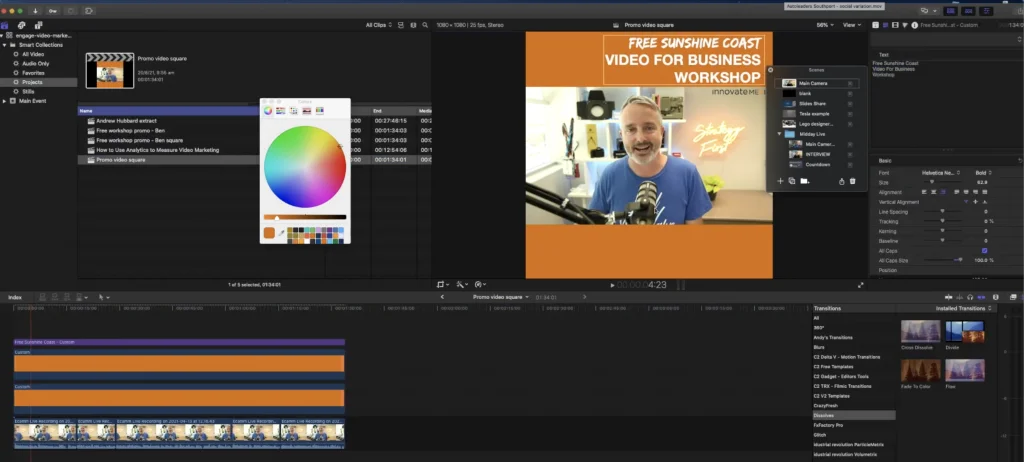
There we go. So now we’ve got the beginnings of a branded frame to this video.
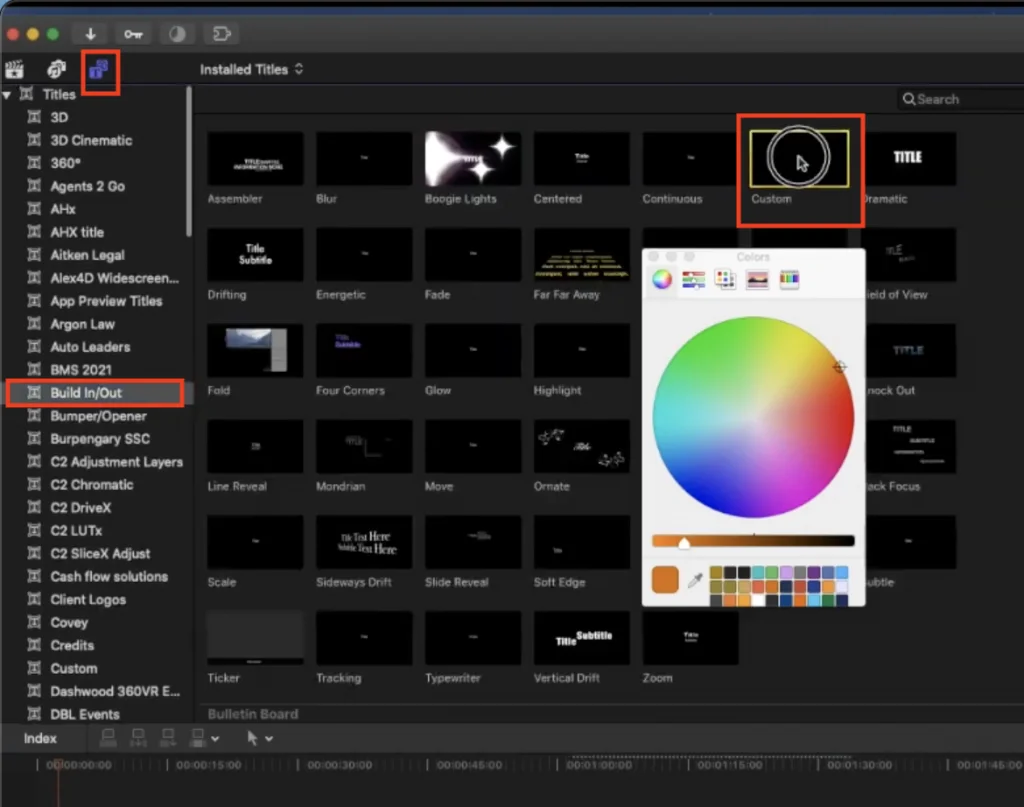
Step 6: Go to the title section and I’m going to just build in and build out and just choose the custom title, which comes to default with Final Cut Pro. And then I’m going to drag that out again over the entire tier of the clip.
Step 7: Here is where I’m creating a headline. Consider the headline section of this video as like a hook, something that’s going to stop the ideal viewer of this video in their tracks and stop the scroll so that we can encourage them to actually click play on this video. Recognising that the eyes are going to see the title at the top of the video before they actually pay attention to what that’s being said or what’s being shown in the captions of the video. In this case, I’m going to position and style this title to be relevant to this video.
Step 8: Now we want to get a little bit of branding in there as well. So I’m going to grab a logo that we have here for our brand, and just going to add that onto the layer as well.
So now we’ve got basically the video in a square aspect ratio with no captions yet. This is where the magic comes into play, where I’m going to introduce you to a tool called Simon Says. Now Simon Says is a paid service, which you can try out for free. You get 15 minutes for free, and then you obviously need to pay one of their paid plans. The benefit of Simon Says is they actually have a Final Cut Pro plugin. When you install the Final Cut Pro extension, it basically enables you to login to your Simon Says account, see how much credit you’ve got left and see the projects that you have at play, and so on, simply within the Final Cut extensions window.
For the remainder of this tutorial, please check out the video below where I will show you how to use Simon Says on your project.

